unity-编辑器扩展
unity编辑器扩展很方便,可以省掉很多制作其他工具的时间(比如技能编辑器,特效编辑器等,都是数据结构的导入导出)
可以直接在 Scene 、Inspector 或者新建一个 Window 中编辑
前篇
可以参考以下几个工程
- UnityEditorExtension - https://github.com/EricLee12138/UnityEditorExtension
- HoudiniLab (比较全) - https://github.com/yangxuan0261/HoudiniLab
- UnityChanToonShader 仓库 (官方) - https://github.com/unity3d-jp/UnityChanToonShaderVer2_Project
Inspector
在 Inspector 中最简单的就是直接把脚本中的成员变量设置为 public,直接就可以在显示出来编辑。
1
2
3
4
5
6
7
8
9
10
11
12
public class Actor : MonoBehaviour {
public Vector3 lookAtPoint = Vector3.zero;
public int mAge;
public string mName;
public bool mIsMale;
public string mPath;
public AnimationCurve mCurve;
public Color mColor;
}
针对脚本定制编辑panel
- 新建一个 Editor 文件夹(啥地方都行),unity会自动监测,自动生成vs的工程目录结构。
- 在 Editor 文件夹下create个编辑器脚本 ActorEditor.cs (可以随意,一般以Editor为后缀),脚本继承 Editor,重写 OnInspectorGUI 方法,这个方法每帧调用绘制 编辑panel
1
2
3
4
5
6
7
8
9
10
11
12
13
14
15
16
17
18
19
20
21
22
23
24
25
26
27
28
29
30
31
32
33
34
35
36
37
38
39
40
41
42
43
44
45
46
47
48
49
50
51
52
53
54
55
using UnityEngine;
using UnityEngine.UI;
using System.Collections;
using UnityEditor;
[] //编辑对应的脚本
public class ActorEditor : Editor
{
//private string mPath1 = "";
private Actor mActor;
public override void OnInspectorGUI()
{
Actor t = (Actor)target;
mActor = t;
t.mName = EditorGUILayout.TextField("name", t.mName);
t.mAge = EditorGUILayout.IntField("age", t.mAge);
t.mIsMale = ETCGuiTools.Toggle("male", t.mIsMale);
t.transform.position = EditorGUILayout.Vector3Field("position", t.transform.position);
EditorGUILayout.Space();
EditorGUILayout.BeginHorizontal(); //被Horizontal包的会显示在同一行
GUILayout.Label("资源路径:");
t.mPath = EditorGUILayout.TextField(t.mPath);
if (GUILayout.Button("浏览"))
EditorApplication.delayCall += Save; //点击按钮调用的方法
EditorGUILayout.EndHorizontal();
EditorGUILayout.Space();
EditorGUILayout.BeginHorizontal();
t.mCurve = EditorGUILayout.CurveField("Curves:", t.mCurve);
EditorGUILayout.EndHorizontal();
EditorGUILayout.Space();
EditorGUILayout.BeginHorizontal();
EditorGUILayout.LabelField("Color:");
t.mColor = EditorGUILayout.ColorField(t.mColor);
EditorGUILayout.EndHorizontal();
}
/// <summary>
/// 选择资源存储路径
/// </summary>
void Save()
{
string path = EditorUtility.OpenFolderPanel("选择要存储的路径", "", "");
if (path.Length != 0)
{
//mPath1 = path;
mActor.mPath = path; //貌似这里只能通过成员实现,不能传参数。可能是异步的原因
EditorUtility.FocusProjectWindow();
}
}
Window
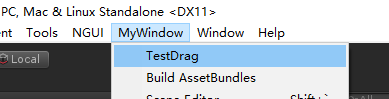
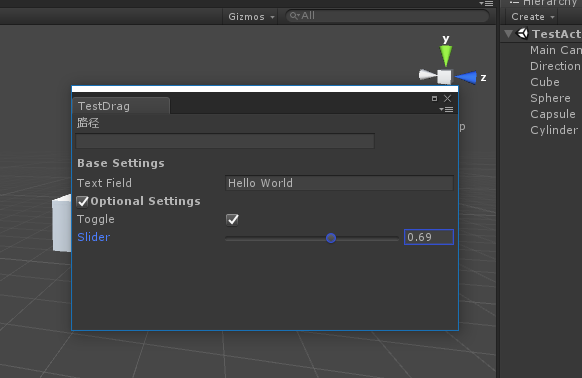
同样也是create个脚本 TestDrag 丢在 Editor 文件夹下。TestDrag 继承 EditorWindow ,写个静态方法 Init 上面用属性标注 [MenuItem("MyWindow/TestDrag")],意思就是会在菜单栏 MyWindow/TestDrag中点击触发弹出TestDrag 的编辑 window,然后重写 OnGUI() 方法具体定制显示需要编辑的东东
1 | using UnityEngine; |
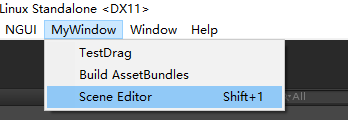
Scene
同样也是create个脚本 SceneRealTimeFocusEditor 丢在 Editor 文件夹下。
在场景中显示一些按钮、文字什么的
1 | using UnityEngine; |

4、附上一个场景对象实时追踪
1 | using UnityEngine; |

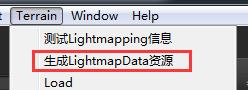
MenuItem 和 ContextMenu 的使用方法
MenuItem
静态方法的
1
2
3[]
static void TestLightmapingInfo() {
}
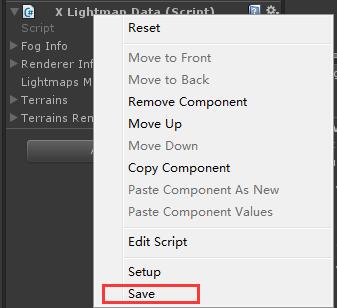
ContextMenu
实例方法的
1
2
3
4
//保存光照信息
[]
public void SaveLightmap() {
}
自定义样式
方式一: 修改内置
可以直接修改内置的样式参数, 不过这是全局修改,默认样式, 会导致所有的 ui 控件都默认使用.
1
EditorStyles.textArea.wordWrap = true;
方式二: 实例化自定义
使用内置样式实例化出来新的样式.
参考: https://answers.unity.com/questions/37310/editorguilayouttextarea-wrap.html
1
2
3
4
5
GUIStyle mStyleArea = null;
mStyleArea = new GUIStyle(EditorStyles.textArea); // 貌似这个不能 某个自定义绘制类 构造函数 里面实例化, 只能第一次 update 的时候实例化
mStyleArea.wordWrap = true;
// 样式实例
EditorGUILayout.TextArea(mGGToken, mStyleArea);- 某个自定义绘制类 构造函数 里面实例化 会报错:
you are pushing more guiclips than you are popping. make sure they are balanced
- 某个自定义绘制类 构造函数 里面实例化 会报错:
ScriptableObject 对象的数据改变后,关闭编辑器才会改变磁盘上相应文件的问题
先设置 dirty,再 save
1 | EditorUtility.SetDirty(targ); |
Odininspector 插件
这个插件使得编辑器扩展非常方便