原文链接:http://liweizhaolili.lofter.com/post/1cc70144_6639759
虽然顶点片段着色器是比较万能的,但写法上却有点困难,所以Unity提供了Surface Shader,这是可以在使用unity自带的光照模型或者自己编写光照模型的基础上,再编写顶点或者片段着色器程序来实现效果的。按道理来说,很多效果使用Surface Shader编写会比较简便,但它也有一个缺点,就是不能使用多个Pass,以至于有些效果是做不出来的。以下是几个例子:
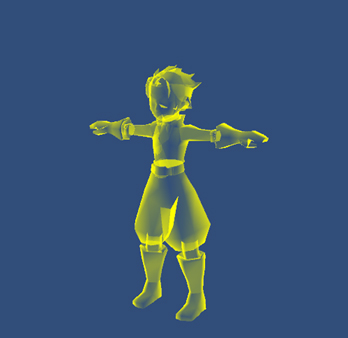
1、一张贴图和主颜色
1
2
3
4
5
6
7
8
9
10
11
12
13
14
15
16
17
18
19
20
21
22
23
24
| Shader "Example/SurfaceExample" {
Properties {
_MainTex ("Base (RGB)", 2D) = "white" {}
_Color("MainColor(RGB)",Color) = (1,1,1,1)
}
SubShader {
Tags { "RenderType"="Opaque" }
LOD 200
CGPROGRAM
#pragma surface surf Lambert
sampler2D _MainTex;
float4 _Color;
struct Input {
float2 uv_MainTex;
};
void surf (Input IN, inout SurfaceOutput o) {
half4 c = tex2D (_MainTex, IN.uv_MainTex);
o.Albedo = c.rgb*_Color.rgb;
o.Alpha = c.a;
}
ENDCG
}
FallBack "Diffuse"
}
|
1
2
3
4
5
6
7
8
9
10
11
12
13
14
15
16
17
18
19
20
21
22
23
24
25
26
27
28
29
| Shader "Azhao/RimColorAphla" {
Properties {
_RimColor ("Rim Color", Color) = (1,1,0,0.0)
_RimPower ("Rim Power", Range(0.5,8.0)) = 2.0
_Alpha("Alpha",Range(0,1)) = 1
}
SubShader {
Tags { "Queue" ="Transparent" "RenderType"="Transparent" }
LOD 200
Blend SrcAlpha OneMinusSrcAlpha
CGPROGRAM
#pragma surface surf Lambert
float4 _RimColor;
float _RimPower;
float _Alpha;
struct Input {
float3 viewDir;
float3 worldNormal;
};
void surf (Input IN, inout SurfaceOutput o) {
o.Albedo = _RimColor.rgb;
half rim = 1.0 - saturate(dot (normalize(IN.viewDir), IN.worldNormal));
o.Alpha = rim*_Alpha;
o.Emission = o.Albedo * pow (rim, _RimPower);
}
ENDCG
}
FallBack "Diffuse"
}
|
3、UV偏移动画效果
1
2
3
4
5
6
7
8
9
10
11
12
13
14
15
16
17
18
19
20
21
22
23
24
25
26
27
28
| Shader "Example/UVOffset" {
Properties {
_MainTex ("Base (RGB)", Rect) = "white" {}
_Color ("Main Color", Color) = (1,1,1,0)
}
SubShader {
Tags { "Queue" ="Transparent" "RenderType"="Transparent" }
LOD 200
Blend SrcAlpha OneMinusSrcAlpha
CGPROGRAM
#pragma surface surf Lambert
float4 _Color;
sampler2D _MainTex;
struct Input {
float2 uv_MainTex;
};
void surf (Input IN, inout SurfaceOutput o) {
float2 newUV;
newUV.x = IN.uv_MainTex.x+_Time;
newUV.y = IN.uv_MainTex.y;
half4 c = tex2D (_MainTex, newUV);
o.Alpha =c.a;
o.Albedo = c.rgb;
}
ENDCG
}
FallBack "Diffuse"
}
|
4、高光法线贴图材质
1
2
3
4
5
6
7
8
9
10
11
12
13
14
15
16
17
18
19
20
21
22
23
24
25
26
27
28
29
30
31
| Shader "Example/SurfaceNormal" {
Properties {
_MainTex ("Base (RGB)", 2D) = "white" {}
_NormalTex("Normal(RGB)",2D) = "white"{}
_Color("MainColor(RGB)",Color) = (1,1,1,1)
}
SubShader {
Tags { "RenderType"="Opaque" }
LOD 200
SeparateSpecular On
CGPROGRAM
#pragma surface surf Lambert
sampler2D _MainTex;
sampler2D _NormalTex;
float4 _Color;
struct Input {
float2 uv_MainTex;
float2 uv_NormalTex;
};
void surf (Input IN, inout SurfaceOutput o) {
half4 c = tex2D (_MainTex, IN.uv_MainTex);
half4 bump = tex2D (_NormalTex, IN.uv_NormalTex);
o.Albedo = c.rgb*_Color.rgb;
o.Alpha = c.a;
o.Normal = UnpackNormal (bump);
o.Specular =bump*bump;
}
ENDCG
}
FallBack "Diffuse"
}
|
5、加入顶点程序的局部巨大化效果

1
2
3
4
5
6
7
8
9
10
11
12
13
14
15
16
17
18
19
20
21
22
23
24
25
26
27
28
29
30
31
32
| Shader "Example/SurfaceVert" {
Properties {
_MainTex ("Base (RGB)", 2D) = "white" {}
_Color("MainColor(RGB)",Color) = (1,1,1,1)
_Amount ("Extrusion Amount", Range(0,0.5)) = 0.1
}
SubShader {
Tags { "RenderType"="Opaque" }
LOD 200
SeparateSpecular On
CGPROGRAM
#pragma surface surf Lambert vertex:vert
sampler2D _MainTex;
sampler2D _NormalTex;
float4 _Color;
struct Input {
float2 uv_MainTex;
float2 uv_NormalTex;
};
float _Amount;
void vert (inout appdata_full v) {
v.vertex.xyz += v.normal * _Amount;
}
void surf (Input IN, inout SurfaceOutput o) {
half4 c = tex2D (_MainTex, IN.uv_MainTex);
o.Albedo = c.rgb*_Color.rgb;
o.Alpha = c.a;
}
ENDCG
}
FallBack "Diffuse"
}
|
附加几句:
以上三篇,分别对三种shader提供了一些简单的例子。有些朋友看到了之后可能觉得很高兴,因为某些效果还是比较的常用,可以直接拿去用了。
但实际上,shader不只是要把效果做出来,还要考虑实际运行时候的效率的,比如在移动平台上面,有可能就需要做一些修改。再者,像Surface Shader这样可以使用预先写好的光照模型,但光照模型是需要怎样编写呢?还有,之前都是介绍了shader编写的规范和语法,但实际上很多特殊的效果都是靠数学公式表现出来的。
所以就算你拿到了这些代码,你也先别高兴太早,其实没什么用的。如果以后有时间,我再找机会介绍一下其他方面的东西吧得实际上着色器也不是一个非常神秘的东西吧?