docker_tomcat使用
官方 docker 镜像:https://hub.docker.com/_/tomcat/
部署
pull 镜像
1
2
3
4
5
wilker@ubuntu:~$ docker search tomcat
NAME DESCRIPTION STARS OFFICIAL AUTOMATED
tomcat Apache Tomcat is an open source implementa... 1471 [OK]
wilker@ubuntu:~$ docker pull tomcatrun 镜像,挂载数据到宿主中
1
2
3
4
5
6
7
8
wilker@ubuntu:~/Desktop$ mkdir -p a_tomcat
docker run \
--name tomcat \
-p 9090:8080 \
-v /home/wilker/Desktop/a_tomcat:/usr/local/tomcat/webapps/test \
-d \
tomcat:latest测试,访问以下 http://192.168.1.102:9090 ,出现那只猫就ok了
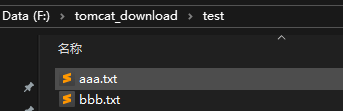
再测一下 webapps 下的 test 目录,在宿主的 a_tomcat 随意建个文件
1
2
wilker@ubuntu:~/Desktop/a_tomcat$ vi aaa.lua
local a = 1访问 http://192.168.1.102:9090/test/aaa.lua,网页出现
local a = 1则表示ok。
参考资料
端口修改
在 /usr/local/tomcat/conf/server.xml 中
1 | <Connector port="8080" protocol="HTTP/1.1" |
将 8080 改为自定义的 端口
配置 tomcat 下载服务器 (文件服务器)
参考: Tomcat文件下载服务器 - https://michaelyb.top/2018/10/Mac-Tomcat-download-server/
进入 tomcat 容器
1
2wilker@ubuntu:~$ docker exec -it tomcat bash
root@92b0091d5292:/usr/local/tomcat#在 /usr/local/tomcat/conf/Catalina/localhost 路径下新建一个文件 download.xml , 内容如下
1 |
|
- docBase:指定路径
修改 web.xml 配置文件,在 /usr/local/tomcat/conf/web.xml 中,修改 servlet 内容为
1
2
3
4
5
6
7
8
9
10
11
12
13<servlet>
<servlet-name>default</servlet-name>
<servlet-class>org.apache.catalina.servlets.DefaultServlet</servlet-class>
<init-param>
<param-name>debug</param-name>
<param-value>0</param-value>
</init-param>
<init-param>
<param-name>listings</param-name>
<param-value>true</param-value>
</init-param>
<load-on-startup>1</load-on-startup>
</servlet>- 其实就是 将 listings 改为 true
重启 tomcat 容器
1
docker restart tomcat
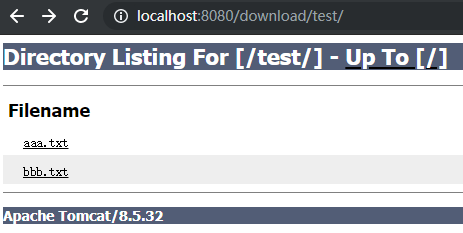
访问以下: http://localhost:8080/download/ 就可以访问到
F:\tomcat_download目录下的资源url 中的 download 就是刚新建的 download.xml 文件名, 所以可以随意更改这个文件名
同时也可以增加多个这样的 xml 指到不同目录, 就可以下载多个地方的文件
这里进入了 http://localhost:8080/download/test/
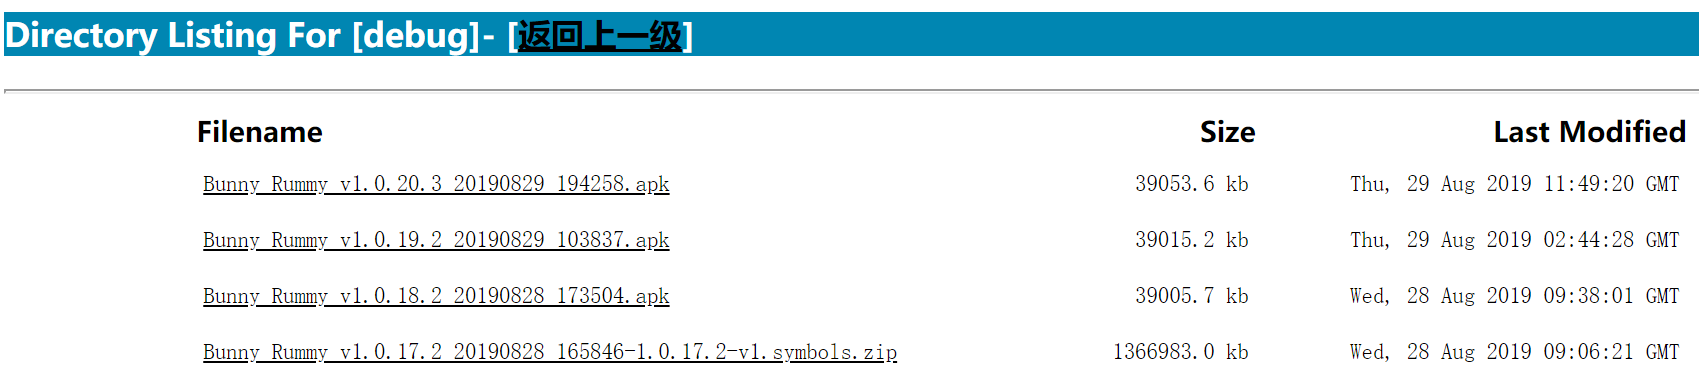
自定义排序
使用的是 globalXsltFile 属性, 配置一个自定义的显示格式文件
- Tomcat显示目录内容 - http://www.warrenfeng.com/?p=244
- 官网文档 - http://tomcat.apache.org/tomcat-8.5-doc/default-servlet.html#dir
这里使用全局配置 globalXsltFile
在 tomcat/conf 目录下创建一个 wilker222.xslt 文件, 内容参考: wilker222.xslt
修改 tomcat/conf/web.xml, 增加 globalXsltFile 配置
1
2
3
4
5
6
7
8
9
10<servlet>
<servlet-name>default</servlet-name>
<servlet-class>org.apache.catalina.servlets.DefaultServlet</servlet-class>
...
<init-param>
<param-name>globalXsltFile</param-name>
<param-value>wilker222.xslt</param-value>
</init-param>
...
</servlet>重启 tomcat
去掉默认欢迎页面

直接修改 $Tomcat/conf/server.xml , 增加一行
1 | ... |
- docBase : 默认指向 ROOT 文件夹, 也就是 tomcat 的默认欢迎首页, 重新指定到自定义的 app 文件夹, 也就是 test/html
直接访问 tomcat 后就是重新指定的文件夹

参考
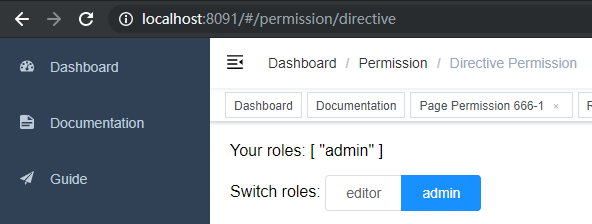
配置多个端口监听多个app
参考: https://blog.csdn.net/dream_ll/article/details/52683432
修改 D:\apache-tomcat-8.5.32\conf\server.xml, 按需增加 n 个 Service
1
2
3
4
5
6
7
8
9
10
11
12
13
14
15
16
17
18
19
20<Service name="vue">
<Connector port="8091" protocol="HTTP/1.1"
connectionTimeout="20000"
redirectPort="8443" />
<Connector port="8092" protocol="AJP/1.3" redirectPort="8443" />
<Engine name="Catalina" defaultHost="localhost">
<Realm className="org.apache.catalina.realm.LockOutRealm">
<Realm className="org.apache.catalina.realm.UserDatabaseRealm"
resourceName="UserDatabase"/>
</Realm>
<Host name="localhost" appBase="webapps"
unpackWARs="true" autoDeploy="true">
<Context path="" docBase="F:\git_repo\test-vue-element-admin\dist" />
<Valve className="org.apache.catalina.valves.AccessLogValve" directory="logs"
prefix="localhost_access_log" suffix=".txt"
pattern="%h %l %u %t "%r" %s %b" />
</Host>
</Engine>
</Service>修改的几处地方
- Connector port 两个都改为其他端口
- docBase 指向不同app
重启 tomcat, 浏览器访问: http://localhost:8091
wilker222.xslt
1 |
|
Nas 中挂载路径
下载 配置目录: /usr/local/tomcat/conf/Catalina/localhost
配置不同下载路径
所有 app 目录: /my_apps
每一个 app 单独一个目录, 然后在 conf\server.xml 中配置每个 app 的绝对路径
临时目录: /my_temp
存放一些配置文件之类的
其他文件服务
chfs (CuteHttpFileServer)
- 官网 - http://iscute.cn/chfs
- chfs (CuteHttpFileServer) - 将文件夹变成网盘网页 - https://www.iplaysoft.com/chfs.html
简单使用
命令, 指定配置启动服务
1
chfs.exe --file=config.ini
配置示例
1
2
3
4
5
6
7
8
9
10
11
12
13
14
15
16
17
18
19
20
21
22
23
24
25
26
27
28
29
30
31
32
33
34
35
36
37
38
39
40
41
42
43
44
45
46
47
48
49
50
51
52
53
54#---------------------------------------
# 请注意:
# 1,如果不存在键或对应值为空,则不影响对应的配置
# 2,配置项的值,语法如同其对应的命令行参数
#---------------------------------------
# 监听端口
port=80
# 共享根目录,通过字符'|'进行分割
# 注意:
# 1,带空格的目录须用引号包住,如 path="c:\a uply name\folder"
# 2,可配置多个path,分别对应不同的目录
path="E:\a_its\rummy-rls-package"
path="E:\a_its\teenpt-rls-package"
# IP地址过滤
#allow=
#----------------- 账户控制规则 -------------------
# 注意:该键值可以同时存在多个,你可以将每个用户的访问规则写成一个rule,这样比较清晰,如:
# rule=::R 表示游客只读
# rule=dev:123456:RWD 表示用户 dev, 密码 123456, 可以 读写和删除
rule=::R
rule=dev:123456:RWD
# 用户操作日志存放目录,默认为空
# 如果赋值为空,表示禁用日志
log=
# 网页标题
html.title="packer"
# 网页顶部的公告板。可以是文字,也可以是HTML标签,此时,需要适用一对``(反单引号,通过键盘左上角的ESC键下面的那个键输出)来包住所有HTML标签。几个例子:
# 1,html.notice=内部资料,请勿传播
# 2,html.notice=`<img src="https://mat1.gtimg.com/pingjs/ext2020/qqindex2018/dist/img/qq_logo_2x.png" width="100%"/>`
# 3,html.notice=`<div style="background:black;color:white"><p>目录说明:</p><ul>一期工程:一期工程资料目录</ul><ul>二期工程:二期工程资料目录</ul></div>`
#html.notice=rummy
# 是否启用图片预览(网页中显示图片文件的缩略图),true表示开启,false为关闭。默认开启
image.preview=true
# 下载目录策略。disable:禁用; leaf:仅限叶子目录的下载; enable或其他值:不进行限制。
# 默认值为 enable
folder.download=
#-------------- 设置生效后启用HTTPS,注意监听端口设置为443-------------
# 指定certificate文件
#ssl.cert=
# 指定private key文件
#ssl.key=
# 设置会话的生命周期,单位:分钟,默认为30分钟
#session.timeout=
miniserve
- GitHub - https://github.com/svenstaro/miniserve
- miniserve 简单美观的文件服务器 - https://learnku.com/articles/31031
简单使用
命令
1
$ miniserve.exe -p 9001 -i 192.168.1.200 -q E:\its\
访问:
http://192.168.1.200:9001/