go-micro-服务发现etcd
go-micro-服务发现etcd
前篇
- 官方
etcd
etcd简介与应用场景
etcd 是一个分布式一致性k-v存储系统,可用于服务注册发现与共享配置,具有以下优点:
- 简单: 基于HTTP+JSON的API让你可以用CURL命令就可以轻松使用。
- 安全: 可以选择SSL客户认证机制。
- 快速: 每个实例每秒支持一千次写操作。
- 可信: 使用 Ralf 算法充分实现了分布式。
服务注册与发现

- 服务启动后向etcd注册,并上报自己的监听的端口以及当前的权重因子等信息,且对该信息设置ttl值。
- 服务在ttl的时间内周期性上报权重因子等信息。
- client端调用服务时向etcd获取信息,进行调用,同时监听该服务是否变化(通过watch方法实现)。
- 当新增服务时watch方法监听到变化,将服务加入代用列表,当服务挂掉时ttl失效,client端检测到变化,将服务踢出调用列表,从而实现服务的动态扩展。
- 另一方面,client端通过每次变化获取到的权重因子来进行client端的加权调用策略,从而保证后端服务的负载均衡。
共享配置
一般服务启动时需要加载一些配置信息,如数据库访问地址,连接配置,这些配置信息每个服务都差不多,如果通过读取配置文件进行配置会存在要写多份配置文件,且每次更改时这些配置文件都要更改,且更改配置后,需要重启服务后才能生效,这些无疑让配置极不灵活,如果将配置信息放入到 etcd 中,程序启动时进行加载并运行,同时监听配置文件的更改,当配置文件发生更改时,自动将旧值替换新值,这样无疑简化程序配置,更方便于服务部署。
windows 安装 etcd
- 安装etcd+golang操作etcd - https://blog.csdn.net/c_circle/article/details/98473421
- 官网下载 - https://github.com/etcd-io/etcd/releases
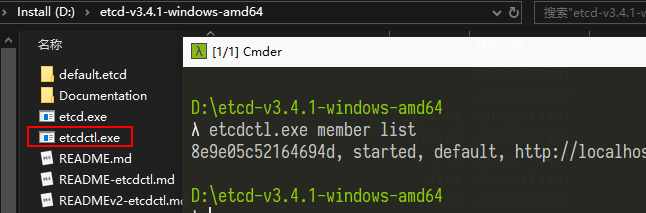
双击 etcd.exe 运行

测试一下
1
2
3
4
5
6
7
8D:\etcd-v3.4.1-windows-amd64
λ etcdctl put aaa 123
OK
D:\etcd-v3.4.1-windows-amd64
λ etcdctl get aaa
aaa
123
命令行工具 etcdctl
etcd 命令
- etcdctl的使用[v3版本] - https://blog.csdn.net/huwh_/article/details/80225902
- etcd 命令行 - https://www.cnblogs.com/breg/p/5756558.html
默认是使用v2的api,如果想使用v3 api每次打开窗口都需要敲一行命令
查看所有key
1 | $ etcdctl get "" --prefix=true // 或者 etcdctl get "" --from-key |
启动参数说明
| 参数 | 说明 |
|---|---|
| –name | etcd 集群中的节点名,这里可以随意,可区分且不重复就行 |
| –listen-peer-urls | 监听的用于 etcd 节点之间通信的url,可监听多个,集群内部将通过这些url进行数据交互(如选举,数据同步等) |
| –initial-advertise-peer-urls | 建议用于节点之间通信的url,节点间将以该值进行通信。 |
| –listen-client-urls | 监听的用于 go等 客户端通信的url,同样可以监听多个。 |
| –advertise-client-urls | 建议使用的客户端通信url, 该值用于 etcd 代理或 etcd 成员与 etcd 节点通信。 |
| –initial-cluster-token etcd-cluster-1 | 节点的 token 值,设置该值后集群将生成唯一id,并为每个节点也生成唯一id,当使用相同配置文件再启动一个集群时,只要该 token 值不一样,etcd集群就不会相互影响。 |
| –initial-cluster | 也就是集群中所有的initial-advertise-peer-urls 的合集 |
| –initial-cluster-state new | 新建集群的标志 |
集群
- etcd 集群搭建及常用场景分析 - https://blog.csdn.net/u010511236/article/details/52386229
- etcd集群搭建 - http://ju.outofmemory.cn/entry/317179
- ETCD单机部署与ETCD集群部署 - https://blog.csdn.net/weixin_34293141/article/details/91839896
- ETCD集群部署流程 (含证书) - https://blog.csdn.net/WangYouJin321/article/details/80417622
- etcd v3 服务注册与发现 Go代码 - https://www.cnblogs.com/sevenPP/p/8149890.html
本机模拟集群 (静态配置)
- etcd 的 go sdk 的使用方法:etcd/clientv3,选举 leader 的方法 (可以跑) - https://www.lijiaocn.com/%E7%BC%96%E7%A8%8B/2019/06/19/etcd-go-sdk-clientv3-usage.html
三个 etcd 的服务地址分别是:
1
2
3127.0.0.1:2379 127.0.0.1:12380 // infra1
127.0.0.1:22379 127.0.0.1:22380 // infra2
127.0.0.3:32379 127.0.0.2:32380 // infra2启动三个 etcd 服务. go 客户端连端口是 client, etcd 服务之间的通信的端口是 peer
1
2
3
4
5
6
7
8
9
10
11
12
13
14
15
16
17
18
19
20
21
22
23
24
25
26
27
28
29
30
31// infra1
$ etcd --name infra1 \
--listen-client-urls http://127.0.0.1:2379 \
--advertise-client-urls http://127.0.0.1:2379 \
--listen-peer-urls http://127.0.0.1:12380 \
--initial-advertise-peer-urls http://127.0.0.1:12380 \
--initial-cluster-token etcd-cluster-1 --initial-cluster \infra1=http://127.0.0.1:12380,infra2=http://127.0.0.1:22380,infra3=http://127.0.0.1:32380 \
--initial-cluster-state new \
--enable-pprof
// infra2
$ etcd --name infra2 \
--listen-client-urls http://127.0.0.1:22379 \
--advertise-client-urls http://127.0.0.1:22379 \
--listen-peer-urls http://127.0.0.1:22380 \
--initial-advertise-peer-urls http://127.0.0.1:22380 \
--initial-cluster-token etcd-cluster-1 \
--initial-cluster \infra1=http://127.0.0.1:12380,infra2=http://127.0.0.1:22380,infra3=http://127.0.0.1:32380 \
--initial-cluster-state new \
--enable-pprof
// infra3
$ etcd --name infra3 \
--listen-client-urls http://127.0.0.1:32379 \
--advertise-client-urls http://127.0.0.1:32379 \
--listen-peer-urls http://127.0.0.1:32380 \
--initial-advertise-peer-urls http://127.0.0.1:32380 \
--initial-cluster-token etcd-cluster-1 \
--initial-cluster \infra1=http://127.0.0.1:12380,infra2=http://127.0.0.1:22380,infra3=http://127.0.0.1:32380 \
--initial-cluster-state new \
--enable-pprof查看集群
1
2
3
4$ etcdctl member list
8211f1d0f64f3269, started, infra1, http://127.0.0.1:12380, http://127.0.0.1:2379, false
91bc3c398fb3c146, started, infra2, http://127.0.0.1:22380, http://127.0.0.1:22379, false
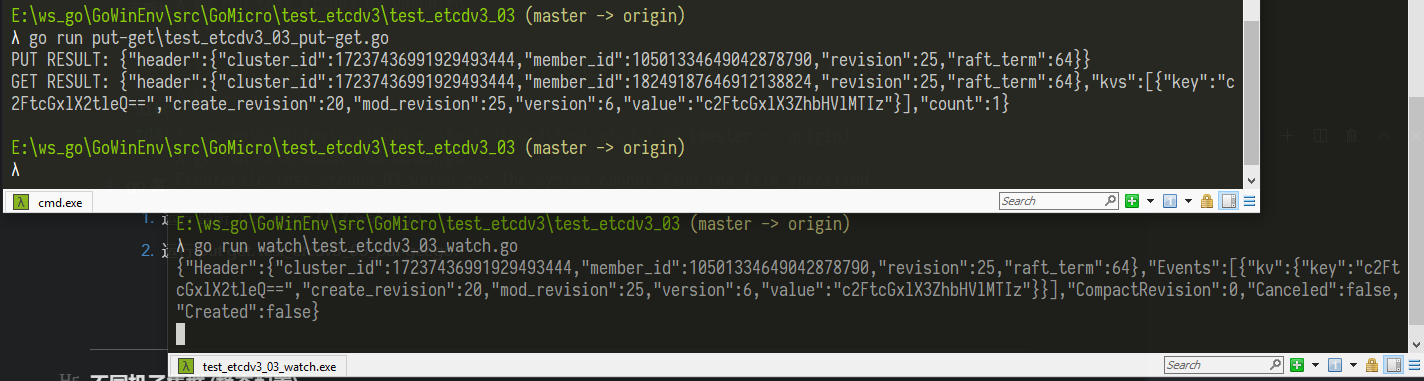
fd422379fda50e48, started, infra3, http://127.0.0.1:32380, http://127.0.0.1:32379, falsego 客户端测试.
运行 监听. test_etcdv3_03_watch.go.
运行 put get. test_etcdv3_03_put-get.go.
不同机子集群 (静态配置)
不同ip机子的启动示例. 参考: 浅入深出ETCD之【集群部署与golang客户端使用】 - https://www.jianshu.com/p/600f14e9e443
1
2
3
4
5
6
7
8
9
10
11
12
13
14
15
16
17
18
19
20
21
22
23
24
25
26
27
28
29// 192.168.4.224
$ ./etcd --name infra0 \
--initial-advertise-peer-urls http://192.168.4.224:2380 \
--listen-peer-urls http://192.168.4.224:2380 \
--listen-client-urls http://192.168.4.224:2379,http://127.0.0.1:2379 \
--advertise-client-urls http://192.168.4.224:2379 \
--initial-cluster-token etcd-cluster-1 \
--initial-cluster infra0=http://192.168.4.224:2380,infra1=http://192.168.4.225:2380,infra2=http://192.168.4.226:2380 \
--initial-cluster-state new
// 192.168.4.225
$ ./etcd --name infra1 \
--initial-advertise-peer-urls http://192.168.4.225:2380 \
--listen-peer-urls http://192.168.4.225:2380 \
--listen-client-urls http://192.168.4.225:2379,http://127.0.0.1:2379 \
--advertise-client-urls http://192.168.4.225:2379 \
--initial-cluster-token etcd-cluster-1 \
--initial-cluster infra0=http://192.168.4.224:2380,infra1=http://192.168.4.225:2380,infra2=http://192.168.4.226:2380 \
--initial-cluster-state new
// 192.168.4.226
$ ./etcd --name infra2 \
--initial-advertise-peer-urls http://192.168.4.226:2380 \
--listen-peer-urls http://192.168.4.226:2380 \
--listen-client-urls http://192.168.4.226:2379,http://127.0.0.1:2379 \
--advertise-client-urls http://192.168.4.226:2379 \
--initial-cluster-token etcd-cluster-1 \
--initial-cluster infra0=http://192.168.4.224:2380,infra1=http://192.168.4.225:2380,infra2=http://192.168.4.226:2380 \
--initial-cluster-state new
动态配置
- etcd集群搭建 - http://ju.outofmemory.cn/entry/317179 - 五、动态配置
go-micro 使用 etcd
初步使用
测试代码 test_etcdv3.go
1
2
3
4
5
6
7
8
9
10
11
12
13
14
15
16
17
18
19
20
21
22
23
package main
import (
"github.com/micro/go-micro"
"github.com/micro/go-plugins/registry/etcdv3"
"log"
"time"
)
func main() {
registre := etcdv3.NewRegistry()
service := micro.NewService(
micro.Registry(registre),
micro.Name("greeter"),
micro.RegisterTTL(time.Second*30),
micro.RegisterInterval(time.Second*15),
)
service.Init()
if err := service.Run(); err != nil {
log.Fatal(err)
}
}修改 etcdv3 仓库引用. 参考: https://zhuanlan.zhihu.com/p/79897640. 不然会报错:
etcd auth.go too many errors需要修改
GoWinEnv\src\github.com\micro\go-plugins\registry\etcdv3下的几个文件. 修改仓库引用 github.com/coreos/etcd/clientv3 为 go.etcd.io/etcd/clientv3watcher.go
1
2
// "github.com/coreos/etcd/clientv3" // 去掉
"go.etcd.io/etcd/clientv3" // 新加etcdv3.go
1
2
3
4
5
// "github.com/coreos/etcd/clientv3" // 去掉
"go.etcd.io/etcd/clientv3" // 新加
// "github.com/coreos/etcd/etcdserver/api/v3rpc/rpctypes" // 去掉
"go.etcd.io/etcd/etcdserver/api/v3rpc/rpctypes" // 新加
删掉
GoWinEnv\src\go.etcd.io\etcd\vendor路径下的 golang.org 目录. 不然运行时会报错:You may have two independent copies of golang.org/x/net/trace in your binary运行测试.
go run1
2
3
4
5> go run e:\ws_go\GoWinEnv\src\GoMicro\test_etcdv3\test_etcdv3.go <
2019-10-02 20:11:26.000556 I | Transport [http] Listening on [::]:4759
2019-10-02 20:11:26.001528 I | Broker [http] Connected to [::]:4760
2019-10-02 20:11:26.018482 I | Registry [etcdv3] Registering node: greeter-e4715ce2-9522-499e-9b12-07f100e56786
指定 registry 为 etcdv3
有两种方式
在启动时通过参数指定.
1
2
3
4
5$ go run main.go --registry=etcdv3 --registry_address=http://127.0.0.1:2379
2019/10/08 16:39:59 Starting server go.micro.srv.example id f895d0ab-4ccb-4e93-8879-1a4057b65494
2019/10/08 16:39:59 Transport [http] Listening on [::]:61435
2019/10/08 16:39:59 Broker [http] Connected to [::]:61436
2019/10/08 16:39:59 Registry [etcdv3] Registering node: go.micro.srv.example-f895d0ab-4ccb-4e93-8879-1a4057b65494在代码中指定
1
2
3
4
5
6
7
8
9
10
11
12
13
14"github.com/micro/go-micro/registry"
"github.com/micro/go-plugins/registry/etcdv3"
func main() {
registerDrive := etcdv3.NewRegistry(func(op *registry.Options) {
op.Addrs = []string{
"http://127.0.0.1:2379",
}
})
server.DefaultServer = server.NewServer(
server.Registry(registerDrive),
)
}然后启动运行.
1
2
3
4
5
$ go run main.go
2019/10/08 16:31:51 Starting server go.micro.srv.example id c8aa3058-de05-4255-aefc-022dd0b856a9
2019/10/08 16:31:51 Transport [http] Listening on [::]:60796
2019/10/08 16:31:51 Broker [http] Connected to [::]:60797
2019/10/08 16:31:51 Registry [etcdv3] Registering node: go.micro.srv.example-c8aa3058-de05-4255-aefc-022dd0b856a9
ttl 参数指定
同样也是两种方式.
在启动时通过参数指定.
1
$ go run main.go --registry=etcdv3 --registry_address=http://127.0.0.1:2379 --register_interval=5 --register_ttl=10
在代码中指定
1
2micro.RegisterTTL(time.Second*30), // 这是设置注册到etcd那个key的过期时间
micro.RegisterInterval(time.Second*10), // 这是服务去etcd报告自己还活着的周期
负载均衡 demo
- 一个go-micro的demo - https://studygolang.com/articles/21340
实践参考: test_etcdv3_06
启动 etcd. 可以使用集群的方式启动
1
2
3
4
λ etcd
2019-10-08 10:38:08.739506 I | etcdmain: Go Version: go1.13
2019-10-08 10:38:08.739506 I | etcdmain: Go OS/Arch: windows/amd64
2019-10-08 10:38:08.771421 I | embed: advertise client URLs = http://127.0.0.1:2379启动 api 网关.
1
2
3
4
f:\a_link_workspace\go\GoWinEnv_new\src\GoMicro\test_etcdv3\test_etcdv3_06\api1 (master -> origin)
$ mainWithEtcdv3.exe --selector=cache --registry=etcdv3 --registry_address=http://127.0.0.1:2379 api --handler=api
2019-10-10 16:36:44.307391 I | HTTP API Listening on [::]:8080
2019-10-10 16:36:44.359253 I | Registry [etcdv3] Registering node: go.micro.api-21c392e4-72de-4c95-9863-520d8b8b3f36- mainWithEtcdv3.exe 是加入了 etcdv3 插件编译出来的 micro 工具.
启动 api 服务. 这里使用了两个代码几乎一样的 api 服务. 用来区别到底调用了哪个
1
2
3
4
5
f:\a_link_workspace\go\GoWinEnv_new\src\GoMicro\test_etcdv3\test_etcdv3_06\api1 (master -> origin)
$ go run main.go --selector=cache --registry=etcdv3 --registry_address=http://127.0.0.1:2379
f:\a_link_workspace\go\GoWinEnv_new\src\GoMicro\test_etcdv3\test_etcdv3_06\api2 (master -> origin)
$ go run main.go --selector=cache --registry=etcdv3 --registry_address=http://127.0.0.1:2379启动 server 服务. 这里使用了两个代码几乎一样的 server 服务. 用来区别到底调用了哪个
1
2
3
4
5
f:\a_link_workspace\go\GoWinEnv_new\src\GoMicro\test_etcdv3\test_etcdv3_06\srv\srv1 (master -> origin)
$ go run main.go --selector=cache --registry=etcdv3 --registry_address=http://127.0.0.1:2379
f:\a_link_workspace\go\GoWinEnv_new\src\GoMicro\test_etcdv3\test_etcdv3_06\srv\srv2 (master -> origin)
$ go run main.go --selector=cache --registry=etcdv3 --registry_address=http://127.0.0.1:2379测试. curl 请求多次:
curl "http://localhost:8080/greeter/say/hello?name=John"1
2
3
4
5
6
7
8
9
10
11
12
13
14$ curl "http://localhost:8080/greeter/say/hello?name=John"
{"api":"--- api two","message":"Hello John, --- srv two. rand:["}
$ curl "http://localhost:8080/greeter/say/hello?name=John"
{"api":"--- api one","message":"Hello John, --- srv two. rand:R"}
$ curl "http://localhost:8080/greeter/say/hello?name=John"
{"api":"--- api two","message":"Hello John, --- srv one. rand:y"}
$ curl "http://localhost:8080/greeter/say/hello?name=John"
{"api":"--- api two","message":"Hello John, --- srv one. rand:g"}
$ curl "http://localhost:8080/greeter/say/hello?name=John"
{"api":"--- api one","message":"Hello John, --- srv one. rand:聜"}
$ curl "http://localhost:8080/greeter/say/hello?name=John"
{"api":"--- api one","message":"Hello John, --- srv two. rand:E"}
$ curl "http://localhost:8080/greeter/say/hello?name=John"
{"api":"--- api two","message":"Hello John, --- srv two. rand:="}
踩坑: curl 请求是报错:
go.micro.api 500. 是因为启动 api 网关是没有指定 handler (--handler=api)参考: Micro API使用 - https://blog.csdn.net/benben_2015/article/details/92675678
服务发现
参考: test_etcdv3_07_micro_watch
1 |
|
micro 工具包集成 etcd
cd 到 micro 根目录.
github.com\micro\micro增加一个插件编译文件 plugins.go, 内容如下
1
2
3
4
5
package main
import (
_ "github.com/micro/go-plugins/registry/etcdv3"
)编译出可执行程序 mainWithEtcdv3.exe
1
$ go build -o mainWithEtcdv3.exe main.go plugins.go
web 查看
必须得在 micro 中集成 etcd. 参考: [micro 工具包集成 etcd](#micro 工具包集成 etcd). 编译出可执行程序 mainWithEtcdv3.exe
启动 mainWithEtcdv3.exe, 带上 registry 参数
mainWithEtcdv3.exe 就是集成了 etcd 编译出来的可执行程序
1
2
3
4
5
$ mainWithEtcdv3.exe --registry=etcdv3 --registry_address=http://127.0.0.1:2379 web
2019-10-09 20:18:07.065747 I | HTTP API Listening on [::]:8082
2019-10-09 20:18:07.066745 I | Transport [http] Listening on [::]:60732
2019-10-09 20:18:07.066745 I | Broker [http] Connected to [::]:60733
2019-10-09 20:18:07.085695 I | Registry [etcdv3] Registering node: go.micro.web-f31d5552-052f-4996-ad40-0eb5e2b21064打开web: http://localhost:8082/registry
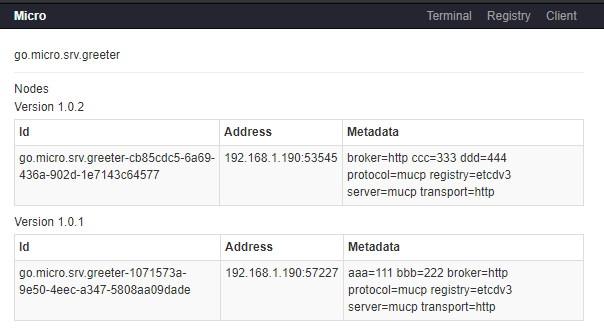
可以看到运行的两个 节点

踩坑
etcd auth.go too many errors
参考: https://zhuanlan.zhihu.com/p/79897640
修改 etcdv3 仓库引用
报错:
You may have two independent copies of golang.org/x/net/trace in your binary参考:
启动 etcd 报错:
Only one usage of each socket address (protocol/network address/port) is normally permitted可能使用的本机地址是 localhost, 换成 127.0.0.1 试试