profiler-Snapdragon_Profiler记录.
前篇
高通替代 Adreno GPU Profiler 的产品, 更强大
官方下载地址: https://developer.qualcomm.com/software/snapdragon-profiler
安装时会要求安装这个 gtk-sharp-2.12.44.msi - https://dl.xamarin.com/GTKforWindows/Windows/gtk-sharp-2.12.44.msi
相关资料
作为高通adreno profiler的替代品,sdp是支持vulkan的。但是目前的sdp版本需要设备进行root才能进行vulkan的测试,所以一些不方便root的设备会比较麻烦
实测
打个简易安卓包测试一下, 手机使用的是高通芯片的 一加3
将目录 %UNITY_ROOT%\Editor\Data\PlaybackEngines\AndroidPlayer\Apk 下 Android 资源复制到 unity Assets\Plugins\Android 目录下, 修改 AndroidManifest.xml 增加一个 存储权限. (不加这个在 sdp 中打不了快照, 会踩这个坑: 弹出警告框提示没有读写存储权限
1
2
| <uses-permission android:name="android.permission.WRITE_EXTERNAL_STORAGE">
</uses-permission>
|
增加一个简易的 shader, 使用一个 噪声图 做溶解效果, 同时修改颜色. 参考: shader
设置 bundleId (这里是 com.yang.xuan), 然后打包apk (aaa3.apk), 手机打开调色模式连接到pc上, 安装apk到手机上. 然后运行app
1
2
3
4
5
6
7
| λ adb devices # 列出设备, 查看设备是否连接成功
List of devices attached
8bd99883 device # 这个就是 一加3
λ adb install aaa3.apk # 安装
Performing Streamed Install
Success
|
打开 sdp, connect 手机
连接手机. connect to a device 或者 file -> connect, 选中需要连接设备, 点击connect
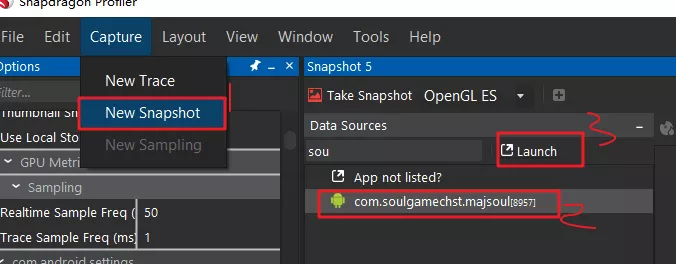
新建一个 snapshot. capture -> new snapshot
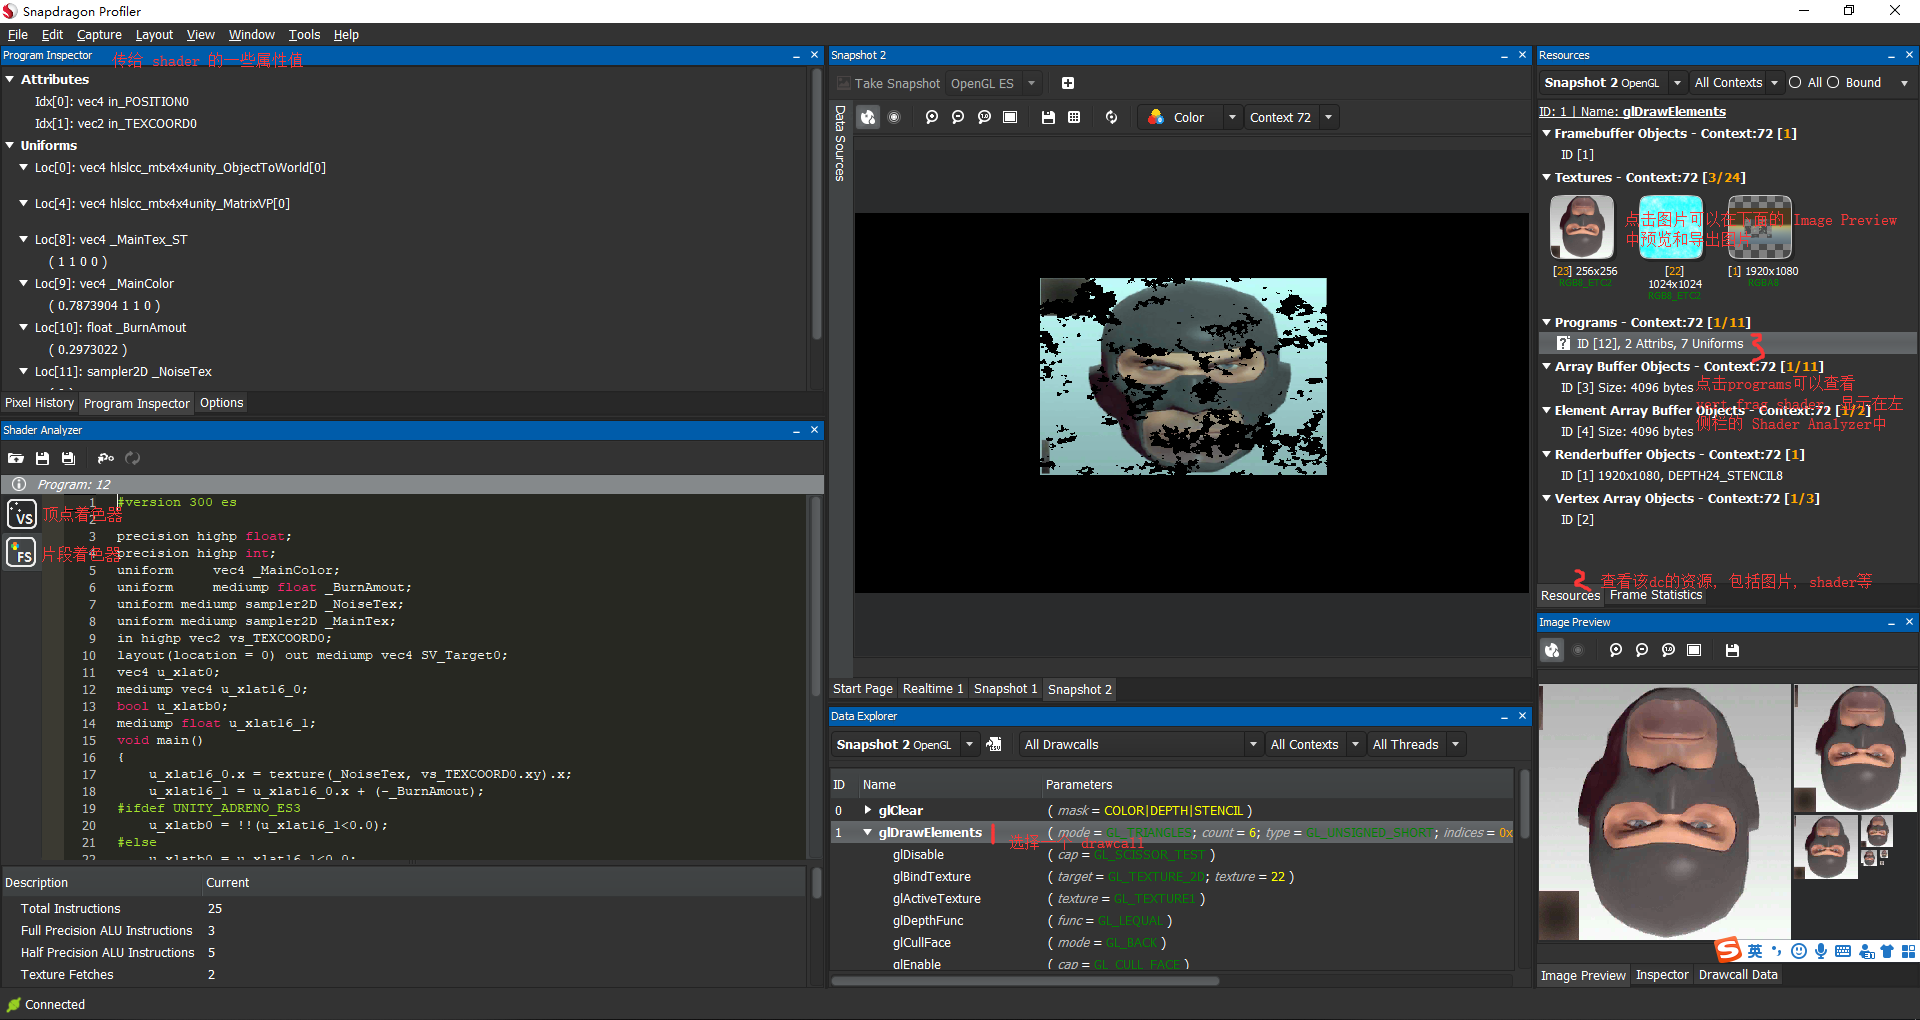
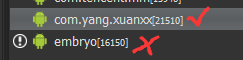
选择app打快照. 根据 bundleId (这里是 com.yang.xuan) 选择, 然后点击 Take Snapshot.
界面说明, glsl 的代码在这里 vert, frag
踩坑
弹出警告框提示没有读写存储权限
这种情况一把出现在自己打的包用来测试, 默认的 AndroidManifest.xml 没有配置任何权限, 所以有个警告提示
解决办法就是把 unity 内置的 AndroidManifest.xml 提取出来加上权限即可测试.
1
2
| <uses-permission android:name="android.permission.WRITE_EXTERNAL_STORAGE" >
</uses-permission>
|
Shader Analyzer 显示是 Binary Program
参考: Snapdragon can not show the Shaders - https://developer.qualcomm.com/forum/qdn-forums/software/snapdragon-profiler/58519
- 左下角切到 options, 将 disable binary program/shaders 设置为 true

重新在 profiler 中启动 app, 然后再次打快照即可
相关代码
shader
1
2
3
4
5
6
7
8
9
10
11
12
13
14
15
16
17
18
19
20
21
22
23
24
25
26
27
28
29
30
31
32
33
34
35
36
37
38
39
40
41
42
43
44
45
46
47
48
49
50
51
52
53
| Shader "test/TestShder" {
Properties {
_MainTex ("Texture", 2D) = "white" {}
_MainColor ("Color", Color) = (1, 1, 1, 1)
_NoiseTex ("Noise (RGB)", 2D) = "white" {}
_BurnAmout ("Burn Amount", Range(0.0, 1.0)) = 0.0
}
SubShader {
Tags { "RenderType"="Opaque" }
LOD 100
Pass {
CGPROGRAM
#pragma vertex vert
#pragma fragment frag
#include "UnityCG.cginc"
struct appdata {
float4 vertex : POSITION;
float2 uv : TEXCOORD0;
};
struct v2f {
float2 uv : TEXCOORD0;
float4 vertex : SV_POSITION;
};
sampler2D _MainTex;
float4 _MainTex_ST;
sampler2D _NoiseTex;
float4 _MainColor;
fixed _BurnAmout;
v2f vert (appdata v) {
v2f o;
o.vertex = UnityObjectToClipPos(v.vertex);
o.uv = TRANSFORM_TEX(v.uv, _MainTex);
return o;
}
fixed4 frag (v2f i) : SV_Target {
fixed4 noiseCol = tex2D(_NoiseTex, i.uv);
clip(noiseCol.r - _BurnAmout);
fixed4 col = tex2D(_MainTex, i.uv) * _MainColor;
return col;
}
ENDCG
}
}
}
|
vert
1
2
3
4
5
6
7
8
9
10
11
12
13
14
15
16
17
18
19
20
21
22
23
| #version 300 es
uniform vec4 hlslcc_mtx4x4unity_ObjectToWorld[4];
uniform vec4 hlslcc_mtx4x4unity_MatrixVP[4];
uniform vec4 _MainTex_ST;
in highp vec4 in_POSITION0;
in highp vec2 in_TEXCOORD0;
out highp vec2 vs_TEXCOORD0;
vec4 u_xlat0;
vec4 u_xlat1;
void main()
{
vs_TEXCOORD0.xy = in_TEXCOORD0.xy * _MainTex_ST.xy + _MainTex_ST.zw;
u_xlat0 = in_POSITION0.yyyy * hlslcc_mtx4x4unity_ObjectToWorld[1];
u_xlat0 = hlslcc_mtx4x4unity_ObjectToWorld[0] * in_POSITION0.xxxx + u_xlat0;
u_xlat0 = hlslcc_mtx4x4unity_ObjectToWorld[2] * in_POSITION0.zzzz + u_xlat0;
u_xlat0 = u_xlat0 + hlslcc_mtx4x4unity_ObjectToWorld[3];
u_xlat1 = u_xlat0.yyyy * hlslcc_mtx4x4unity_MatrixVP[1];
u_xlat1 = hlslcc_mtx4x4unity_MatrixVP[0] * u_xlat0.xxxx + u_xlat1;
u_xlat1 = hlslcc_mtx4x4unity_MatrixVP[2] * u_xlat0.zzzz + u_xlat1;
gl_Position = hlslcc_mtx4x4unity_MatrixVP[3] * u_xlat0.wwww + u_xlat1;
return;
}
|
frag
1
2
3
4
5
6
7
8
9
10
11
12
13
14
15
16
17
18
19
20
21
22
23
24
25
26
27
28
29
| #version 300 es
precision highp float;
precision highp int;
uniform vec4 _MainColor;
uniform mediump float _BurnAmout;
uniform mediump sampler2D _NoiseTex;
uniform mediump sampler2D _MainTex;
in highp vec2 vs_TEXCOORD0;
layout(location = 0) out mediump vec4 SV_Target0;
vec4 u_xlat0;
mediump vec4 u_xlat16_0;
bool u_xlatb0;
mediump float u_xlat16_1;
void main()
{
u_xlat16_0.x = texture(_NoiseTex, vs_TEXCOORD0.xy).x;
u_xlat16_1 = u_xlat16_0.x + (-_BurnAmout);
#ifdef UNITY_ADRENO_ES3
u_xlatb0 = !!(u_xlat16_1<0.0);
#else
u_xlatb0 = u_xlat16_1<0.0;
#endif
if(((int(u_xlatb0) * int(0xffffffffu)))!=0){discard;}
u_xlat16_0 = texture(_MainTex, vs_TEXCOORD0.xy);
u_xlat0 = u_xlat16_0 * _MainColor;
SV_Target0 = u_xlat0;
return;
}
|
20220716
修改 shader
修改 选中的批次的代码
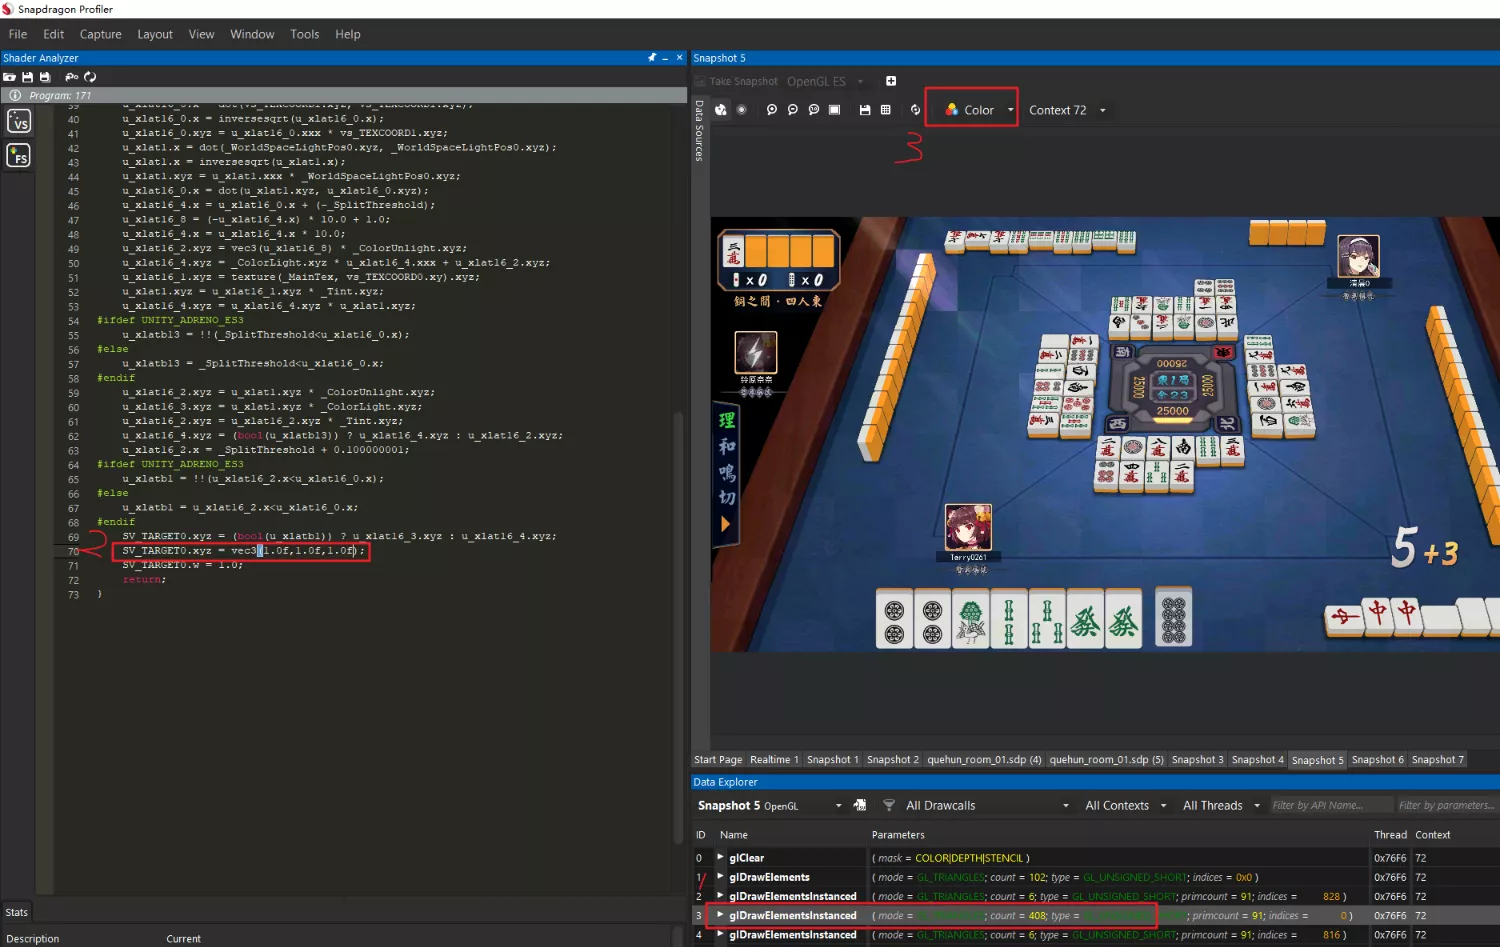
然后点击 3, 切换到别的再切回 color 就有效果了
切换 snapshot
这里切换才有用
