ios-xcode自动构建ipa包
XCode 自动打包命令
这里我使用的是Xcode8.3
参考资料:http://www.jianshu.com/p/3f43370437d2
获取证书
貌似xcode7.0以上都可以免费使用开发者证书
先使用Xcode打开工程,使用免费证书签名

然后会自动生成 xxx.mobileprovision,这里面就包含了teamId等信息
1
2
3
4
MacBook-Pro:Provisioning Profiles wilker$ pwd
/Users/wilker/Library/MobileDevice/Provisioning Profiles
MacBook-Pro:Provisioning Profiles wilker$ ls
fa4ea842-adb4-4dec-82f3-c178f47769d8.mobileprovision
打包命令
从xcode工程 xxx.xcodeproj 打出 xxx.xcarchive 文件
1
2
3
4
5
6
7
8
9
10
11
# 解锁钥匙串
cmd = '''security unlock-keychain -p "用户密码" ~/Library/Keychains/login.keychain'''
res = utils.execute(cmd)
if res != 0:
print("解锁钥匙串 失败:", res)
return
# 构建 archive 包
cmd = '''xcodebuild -project %s -scheme "MyXMan-mobile" -configuration %s -sdk iphoneos10.3 -archivePath %s archive DEVELOPMENT_TEAM="%s ENABLE_BITCODE=NO" '''% \
(project_path, debug_tag, archive_path, team_id)
res = utils.execute(cmd)从 xxx.xcarchive 文件 打出 xxx.ipa 包
1
2
cmd = '''xcodebuild -exportArchive -archivePath %s -exportOptionsPlist %s -exportPath %s '''%(appAchive_path, export_options_plist_path, gself_path)
res = utils.execute(cmd)
xcode 生成包的默认路径
Xcode–>perferences–> locations
Derived Data,下面有一个路径:
/Users/Liam/Library/Developer/Xcode/DerivedData
这个就是默认的生成路径。点击旁边的箭头就可跳转到该文件夹。这里不值程序的目标文件,还有其他的生成的文件。
如果你想在项目中也生成一份,那么就点击Advanced按钮。将Build Location,选择“locations specified by targets”就可以了。
这时你在Build,那么项目路径下就会产生Build目录。
导出 ipa命令的参数
-project
- 项目的 xcode工程路径:
/Users/wilker/workplace/cocos2dx/MyXMan/frameworks/runtime-src/proj.ios_mac/MyXMan.xcodeproj
-archivePath
- 导出的 Archive 文件路径
-configuration
- Debug or Release
指定 CPU 架构
- https://stackoverflow.com/questions/6151549/how-can-i-build-a-specific-architecture-using-xcodebuild
命令中加入参数: ARCHS=arm64 ONLY_ACTIVE_ARCH=NO
-sdk
sdk 设置错误会报错:xcodebuild: error: SDK “iphoneos10.2” cannot be located
使用最新的 sdk 的话, 参数指定为:
-sdk iphoneos(真机 sdk, 参考: https://stackoverflow.com/questions/4314804/parameter-for-xcodebuild-for-using-latest-sdk)查看已有的sdk,命令:
xcodebuild -showsdks,然后选择已有的sdk1
2
3
4
5
6
7
8
9
10
11
12
13
14
15
16
17
18
19
20
21MacBook-Pro:Provisioning Profiles wilker$ xcodebuild -showsdks
iOS SDKs:
iOS 10.3 -sdk iphoneos10.3
iOS Simulator SDKs:
Simulator - iOS 10.3 -sdk iphonesimulator10.3
macOS SDKs:
macOS 10.12 -sdk macosx10.12
tvOS SDKs:
tvOS 10.2 -sdk appletvos10.2
tvOS Simulator SDKs:
Simulator - tvOS 10.2 -sdk appletvsimulator10.2
watchOS SDKs:
watchOS 3.2 -sdk watchos3.2
watchOS Simulator SDKs:
Simulator - watchOS 3.2 -sdk watchsimulator3.2
scheme
scheme 设置错误会报错:xcodebuild: error: The project named “MyXMan” does not contain a scheme named “MyXMan”
命令:
xcodebuild -project /Users/wilker/workplace/cocos2dx/MyXMan/frameworks/runtime-src/proj.ios_mac/MyXMan.xcodeproj -list1
2
3
4
5
6
7
8
9
10
11
12
13
14
15
16
17
18
19
20
21
22
23MacBook-Pro:release_tools wilker$ xcodebuild -project /Users/wilker/workplace/cocos2dx/MyXMan/frameworks/runtime-src/proj.ios_mac/MyXMan.xcodeproj -list
Information about project "MyXMan":
Targets:
MyXMan-mobile
MyXMan-desktop
Build Configurations:
Debug
Release
If no build configuration is specified and -scheme is not passed then "Release" is used.
Schemes:
MyXMan-mobile
MyXMan-desktop
libsimulator Mac
libsimulator iOS
libluacocos2d Mac
libluacocos2d iOS
libluacocos2d tvOS
libcocos2d Mac
libcocos2d iOS
libcocos2d tvOS
exportOptionsPlist
exportOptionsPlist配置文件设置 teamID 错误会报错:Error Domain=IDEDistributionErrorDomain Code=1 “No valid iOS Distribution signing identities belonging to team 38W5465CZX were found.” UserInfo={NSLocalizedDescription=No valid iOS Distribution signing identities belonging to team 38W5465CZX were found.}
配置文件内容
1
2
3
4
5
6
7
8
9
<plist version="1.0">
<dict>
<key>method</key>
<string>development</string>
<key>teamID</key>
<string>JW38L9N6HH</string>
</dict>
</plist>参考资料:
可选参数
- compileBitcode: Bool
- For non-App Store exports, should Xcode re-compile the app from bitcode? Defaults to YES.
- embedOnDemandResourcesAssetPacksInBundle : Bool
- For non-App Store exports, if the app uses On Demand Resources and this is YES, asset packs are embedded in the app bundle so that the app can be tested without a server to host asset packs. Defaults to YES unless onDemandResourcesAssetPacksBaseURL is specified.
- iCloudContainerEnvironment
- For non-App Store exports, if the app is using CloudKit, this configures the “com.apple.developer.icloud-container-environment” entitlement. Available options: Development and Production. Defaults to Development.
- manifest : Dictionary
- For non-App Store exports, users can download your app over the web by opening your distribution manifest file in a web browser. To generate a distribution manifest, the value of this key should be a dictionary with three sub-keys: appURL, displayImageURL, fullSizeImageURL. The additional sub-key assetPackManifestURL is required when using on demand resources.
- method : String
- Describes how Xcode should export the archive. Available options: app-store, ad-hoc, package, enterprise, development, and developer-id. The list of options varies based on the type of archive. Defaults to development.
- onDemandResourcesAssetPacksBaseURL : String
- For non-App Store exports, if the app uses On Demand Resources and embedOnDemandResourcesAssetPacksInBundle isn’t YES, this should be a base URL specifying where asset packs are going to be hosted. This configures the app to download asset packs from the specified URL.
- teamID : String
- The Developer Portal team to use for this export. Defaults to the team used to build the archive.
- thinning : String
- For non-App Store exports, should Xcode thin the package for one or more device variants? Available options: (Xcode produces a non-thinned universal app), (Xcode produces a universal app and all available thinned variants), or a model identifier for a specific device (e.g. “iPhone7,1”). Defaults to .
- uploadBitcode : Bool
- For App Store exports, should the package include bitcode? Defaults to YES.
- uploadSymbols : Bool
- For App Store exports, should the package include symbols? Defaults to YES.
- compileBitcode: Bool
xcode安装ipa
通过xcode安装ipa文件
打开xcode
菜单栏 ——> Window ——>Devices
点击+号,添加本地IPA文件即可

通过命令行的安装ipa文件
首先安装libimobiledevice和ideviceinstaller
1
2
3
4
5
6
$ brew uninstall ideviceinstaller
$ brew uninstall libimobiledevice
$ brew install --HEAD libimobiledevice
$ brew link --overwrite libimobiledevice
$ brew install ideviceinstaller
$ brew link --overwrite ideviceinstaller安装应用(真机)
1
$ ideviceinstaller -i xxx.ipa
卸载应用(真机)
1
$ ideviceinstaller -U <bundleId>
踩坑
使用命令把 archive 导出成 ipa 包报错:
error: exportArchive: requires a provisioning profile原因是导出的 exportOptionsPlist 参数的文件配置错误. 为了保证绝对正确, 先用 xcode 进行一次导出 archive 在 导出 ipa. xcode 就会生成一份 exportOptions.plist 文件, 以后就用这个文件就ok了.
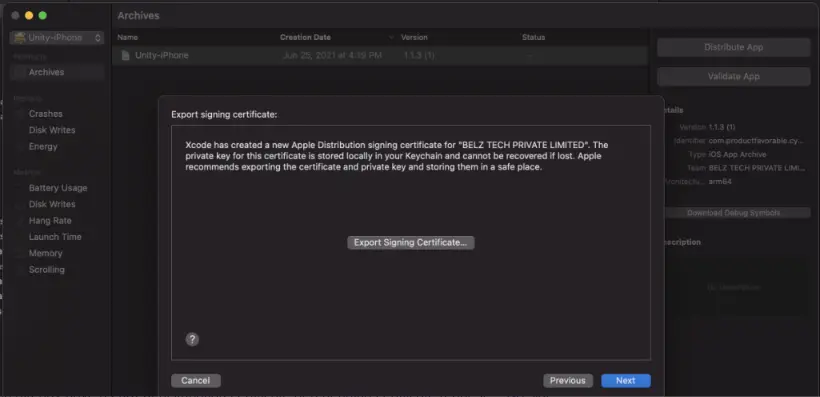
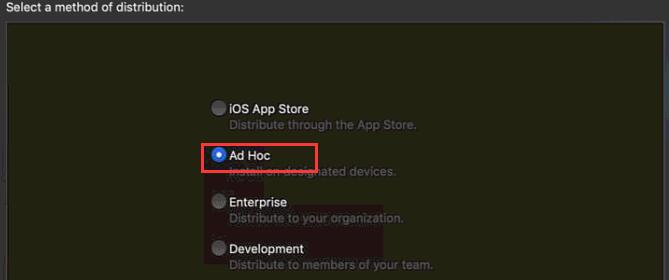
导出 archive

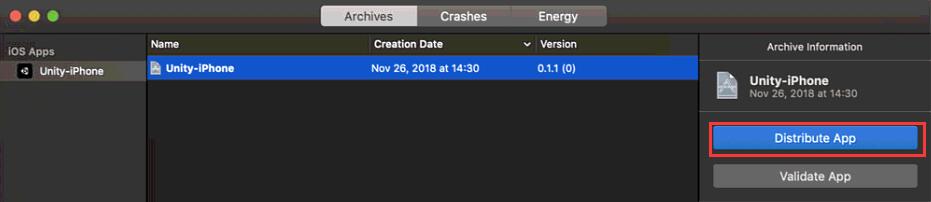
导出 ipa
(我的证书是 adhoc 的, 装到真机测试)
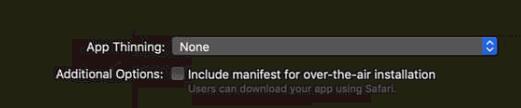
不做app瘦身
选择证书

导出就ok了
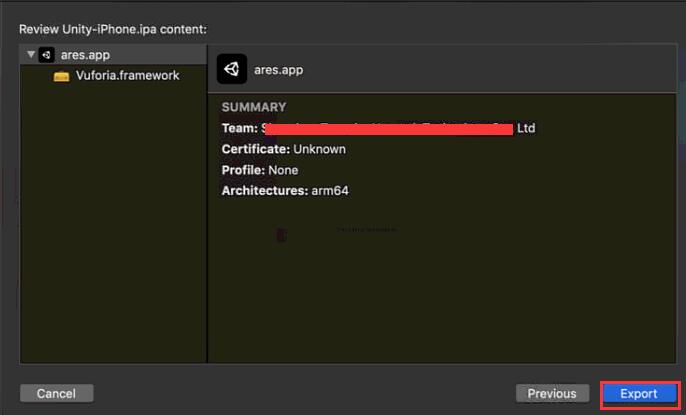
导出ipa成功后, 在导出目录中就有个 ExportOptions.plist 文件, 保存好这个文件, 后面打包就用这个文件.
参考资料:
命令行打包 报错找不到 ios 分发证书
报错: No signing certificate "iOS Distribution" found
出现这种情况, 先用 xcode 使用 archive 打一次 ipa, 这个过程中会自动修复这个问题, 生成一个 ios 分发证书